Templates
If you have tasks that you want to repeat on a fixed recurring basis, or on an ad-hoc fashion, templates can help you. Templates tasks lets you change the task name upon launch. For example your template name may be "Book Trip". Upon launch you can change the name to "Book Trip to Hong Kong" without changing the original name of "Book Trip". You can also use this feature to track important task as you can review Last Issue, Last Completed and Completed by. PDCA Complete will update these fields as they happen.
1. To create a new template task, click on the New button. See points 5 to 7 below.
2. Existing template tasks can be either:
- Rocket icon: Launched, see points 8 through to 13 below.
- Edit icon: Amended, see points 5 to 7 below.
- Trashcan icon: Deleted.
3. The header information for the collection of template tasks is as follows:
- Task Templates: This is the name of the task.
- Date Created: The date when the task was first added to the system.
- Last Issued: This is the date when the rocket icon was last used for this task.
- Last Completed: This is the date when the task in question was last completed by the person it was assigned to / approved by.
- Completed by: The team member that complete the task last.
4. The list of templates can be adjusted by using the options in this area of the screen.
The Views available are:
- My Templates: This allows you to see just your template tasks.
- Direct Staff Templates: This options allows you to see the templates that the team members that report to you have created.
The Sort options are:
- Date Created: This orders the tasks in ascending order for the dates the tasks were created.
- Last Completed: The tasks are ordered in ascending order to the last completed date.
- Last Issued: The last issued date is used to re-order the list of tasks, newest first.
- Template: This option re-orders the list, by task description, in alphabetical order.
- Refresh icon: This will reset the view / sort options selected.
- PDF icon: The filtered list of templates can be downloaded as a printable PDF. Please note that this is only available with a paid subscription.
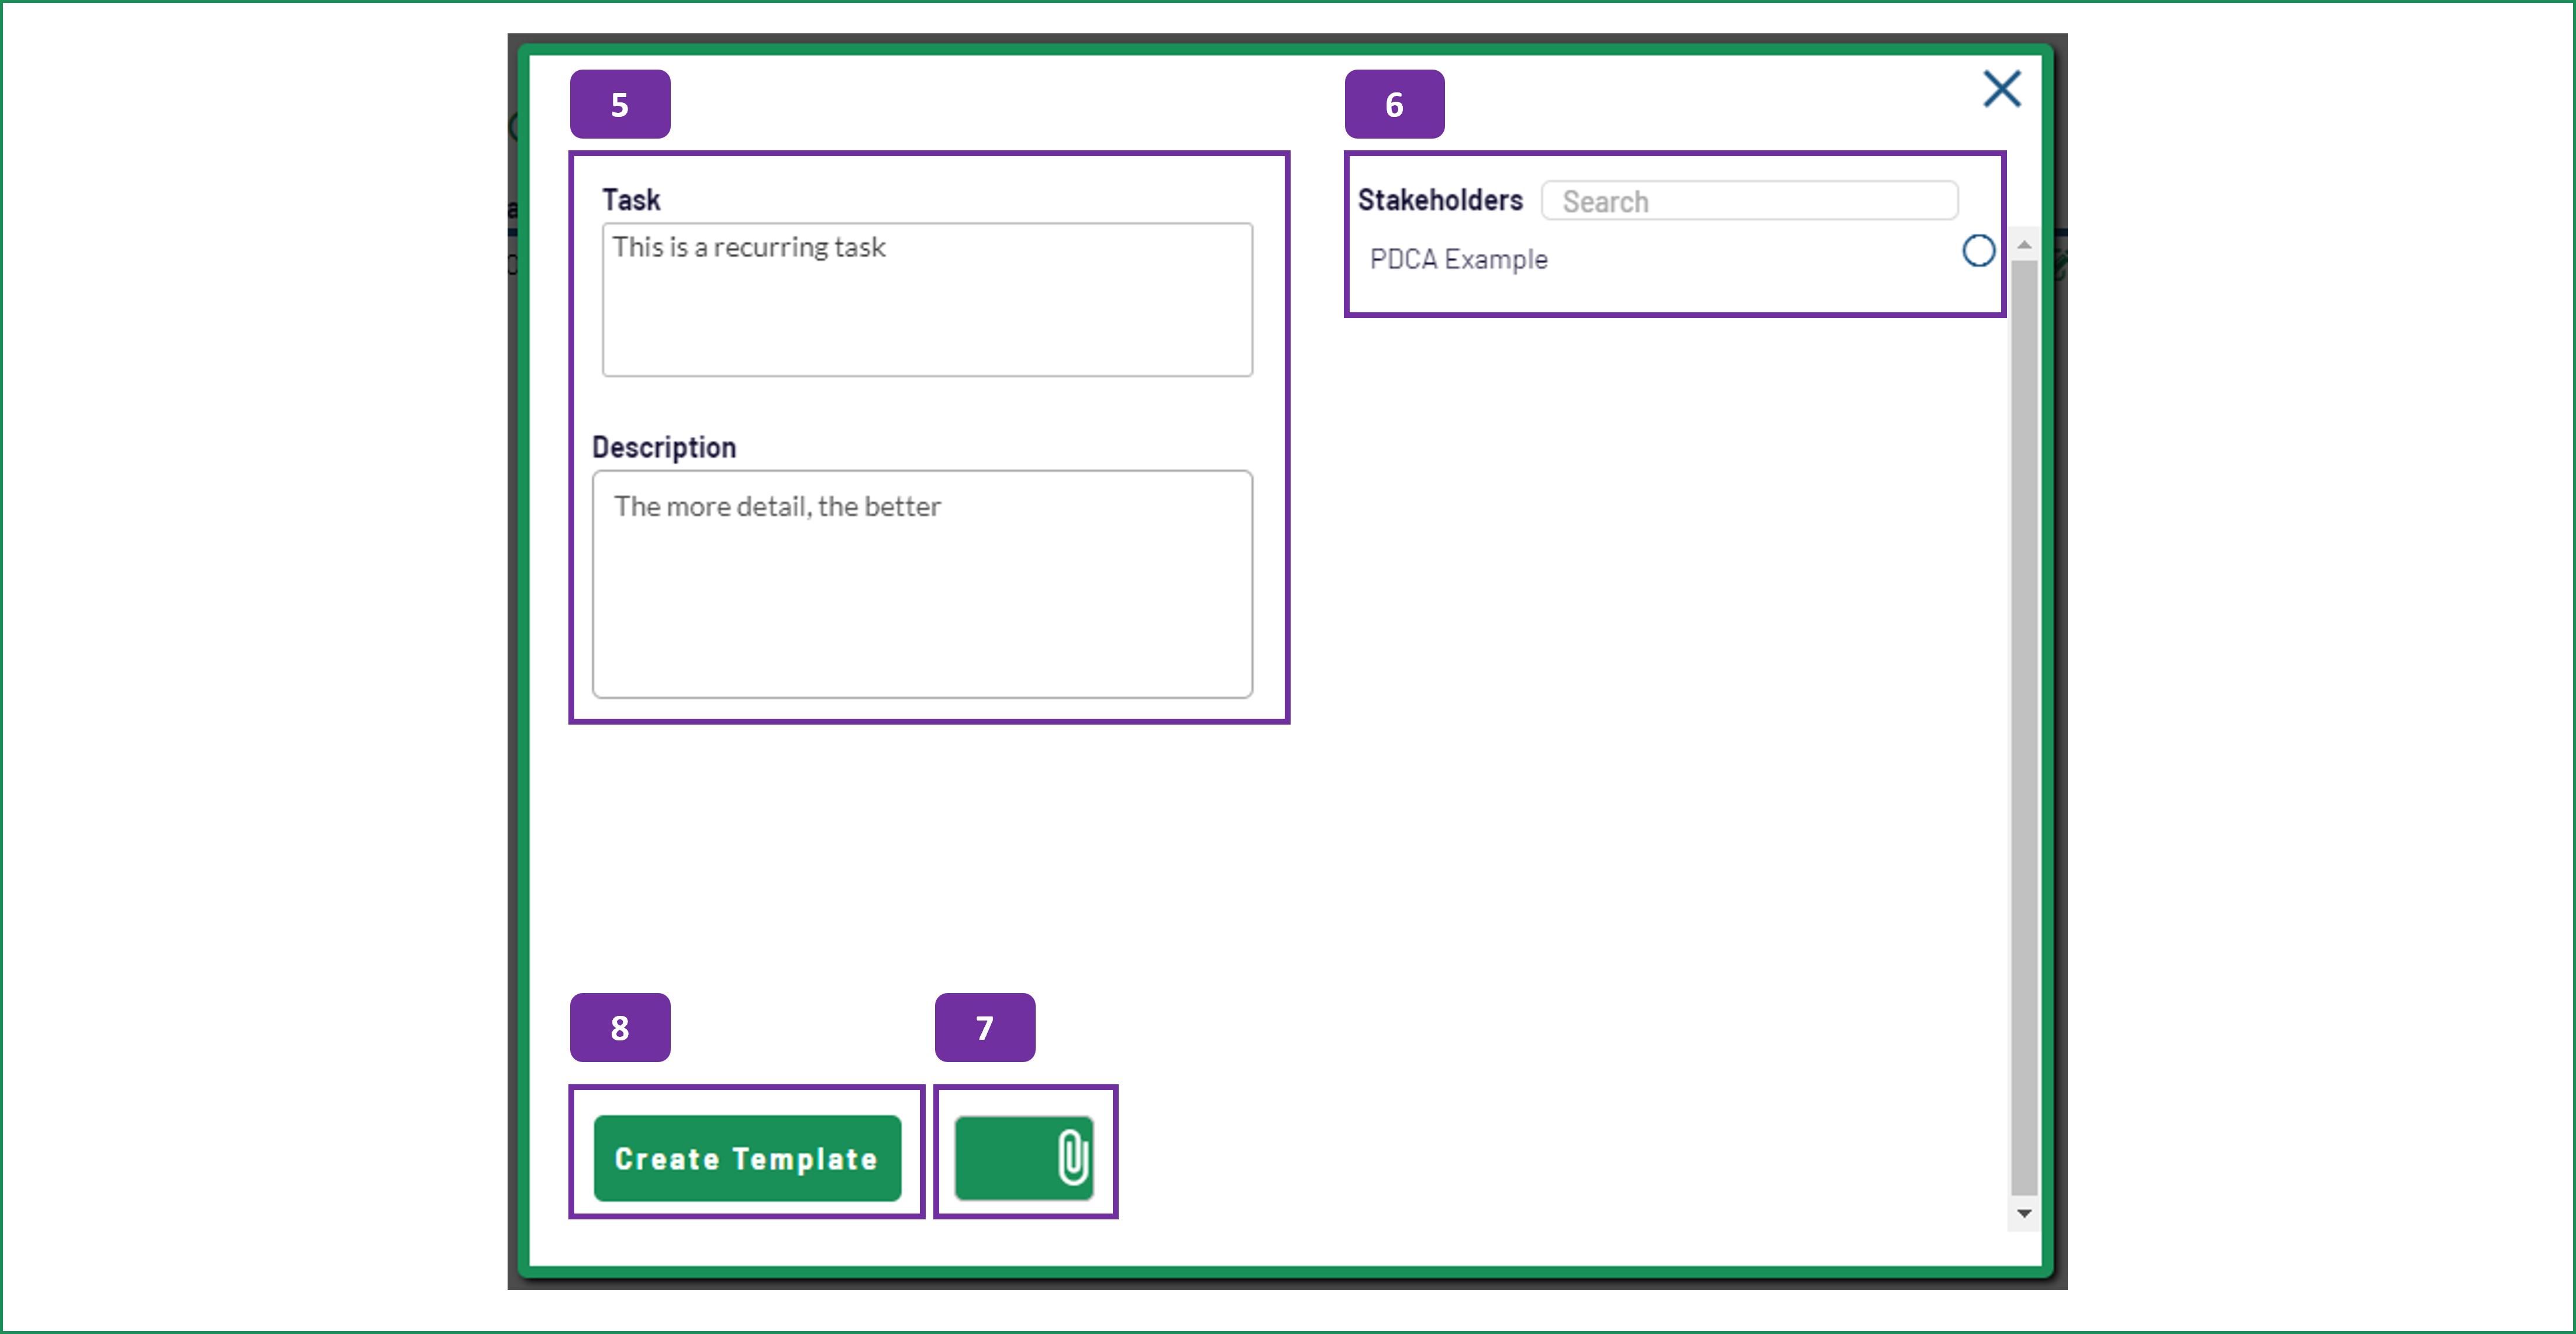
5. When you create, or edit, a template task you can add detail to the Task and its Description.
6. If you need to add Stakeholders to the task, you can select them in this area of the screen. Adding stakeholders to a task means that they will receive email notifications when tasks are updated, completed etc...
7. If you wish to attach a file to the template, click on the paperclip icon. This will allow you to upload one file to the task. This is for paid subscriptions only, limited to 5MB and doesn't include video files.
8. When you have input the necessary information, click on the Create Template button.
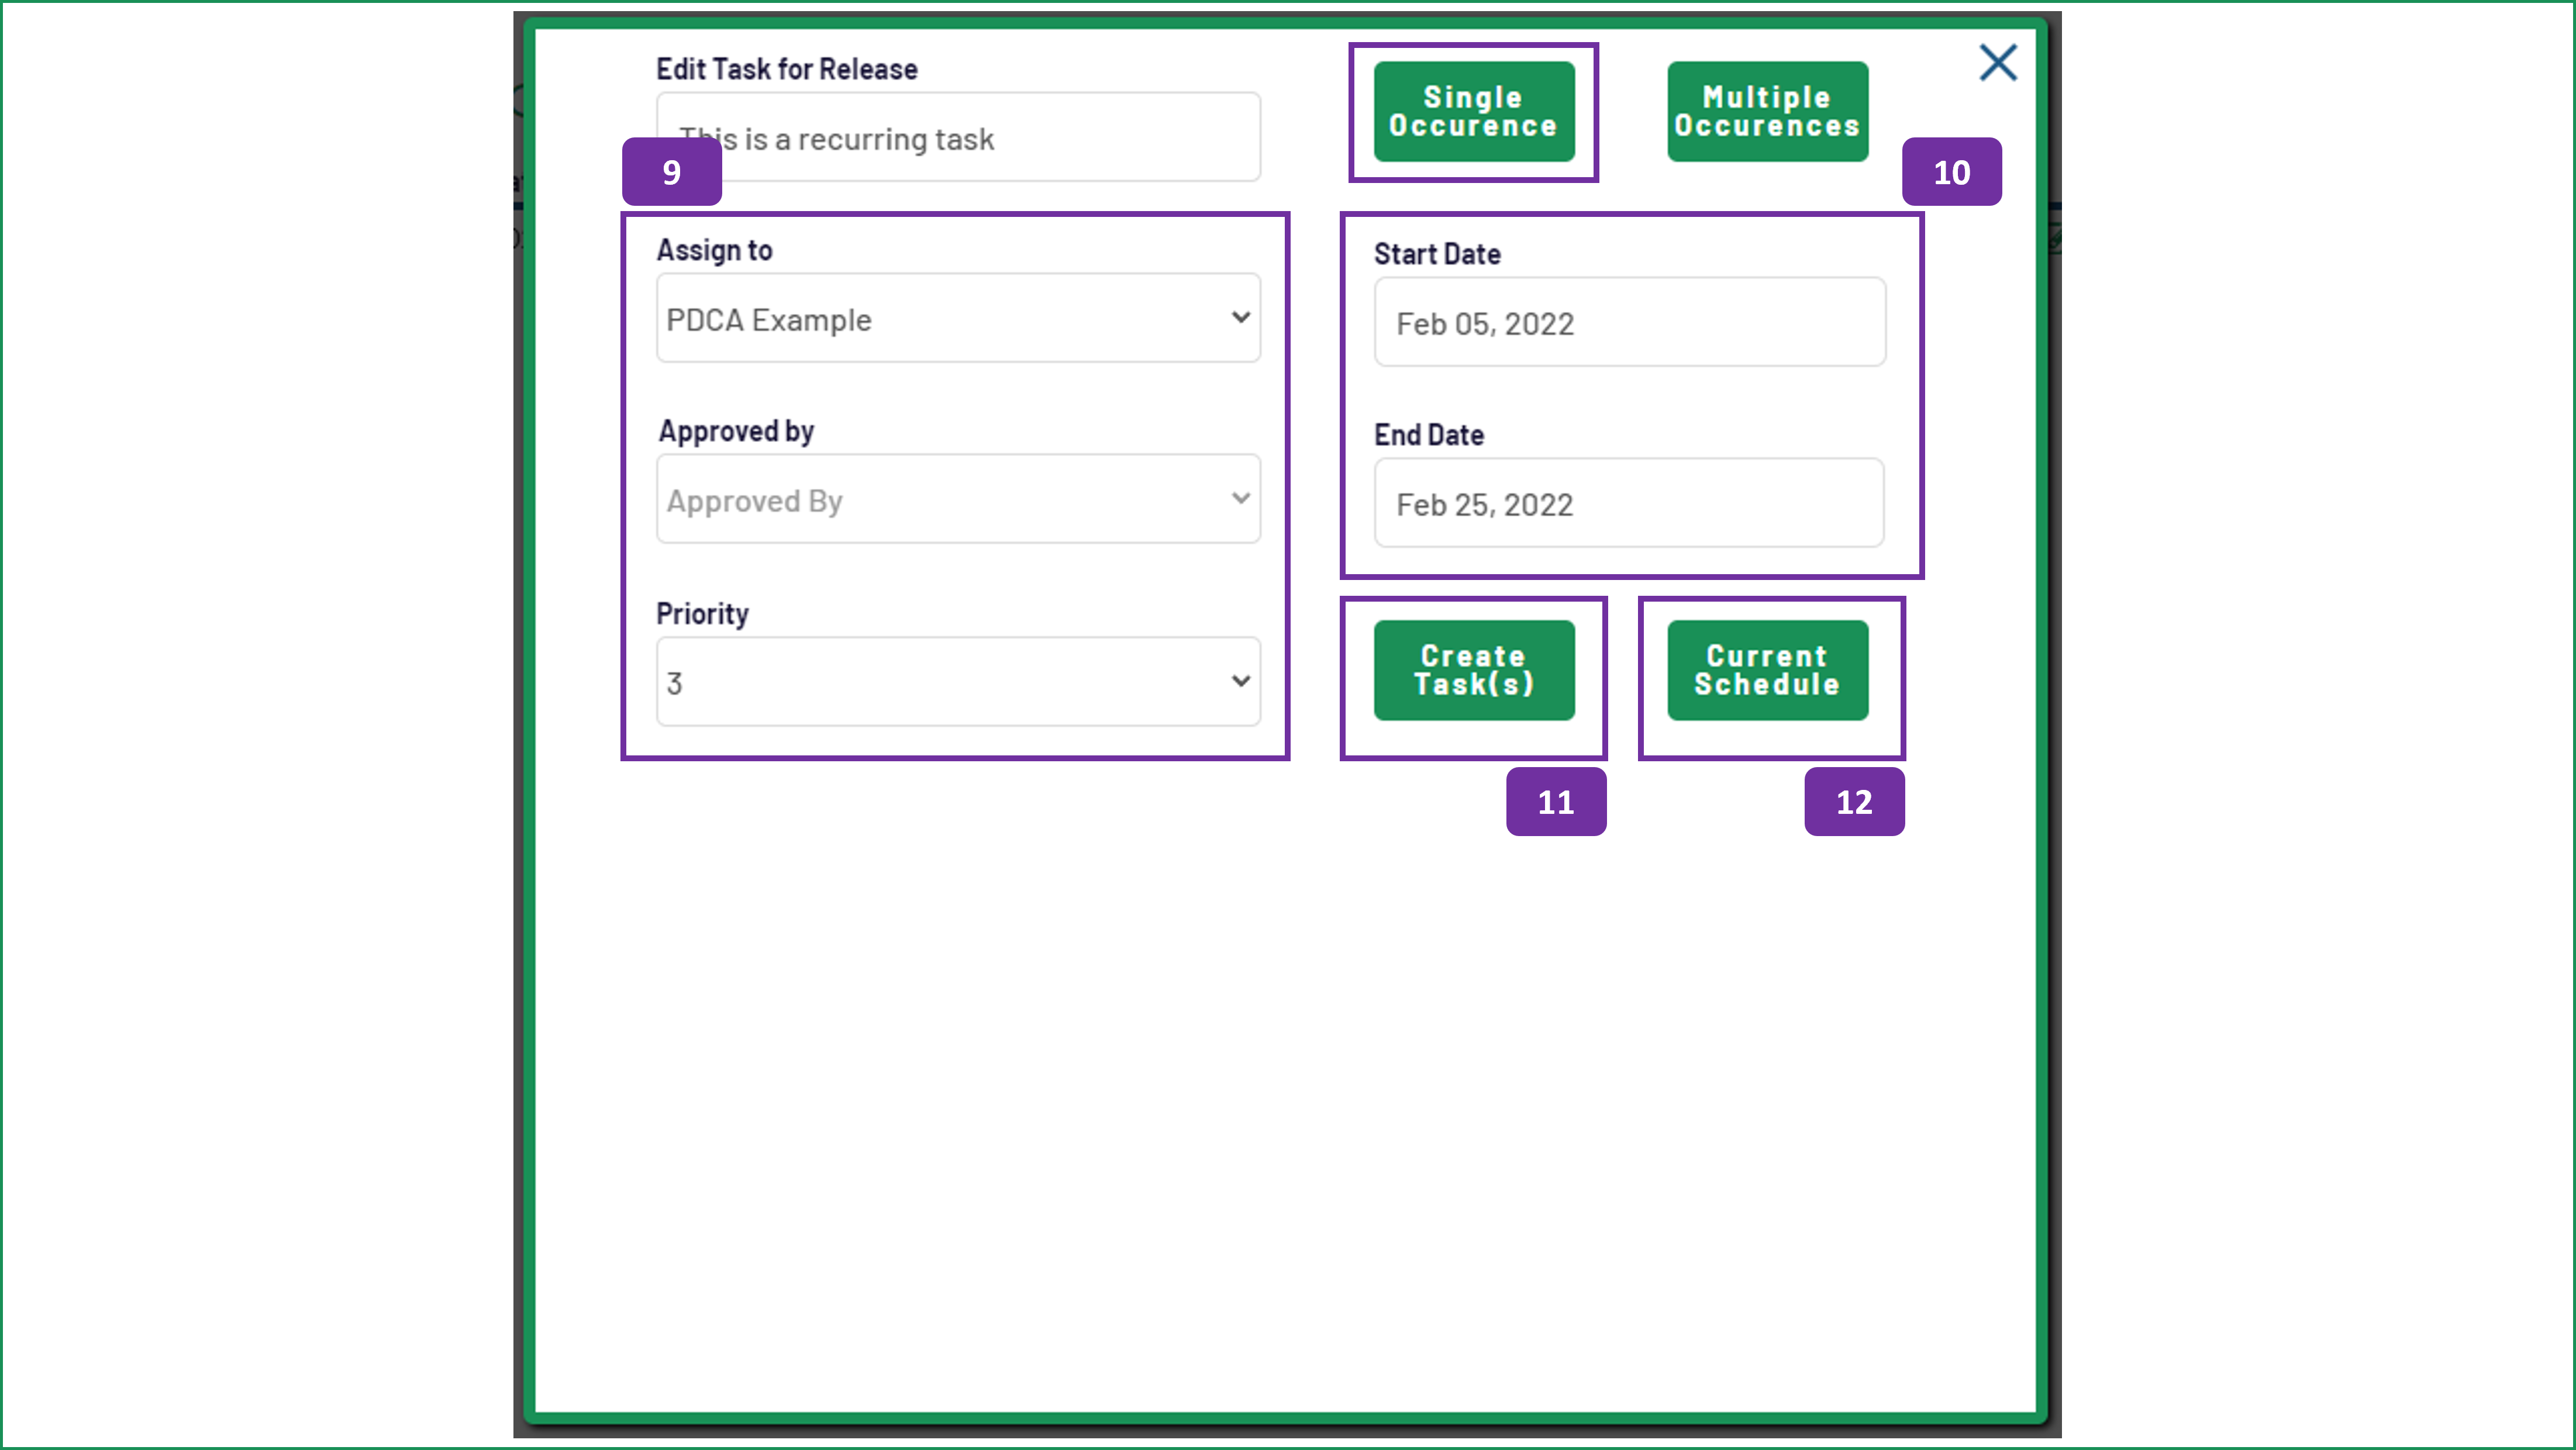
9. When you launch a task, you can launch it once during this process or create a recurring schedule. In the above screenshot we are working with the Single Occurrence option (which is the default). In this area of the pop up window you can select who you want to Assign the task to, choose an Approver (if required) and adjust the Priority level. The Assign To and Approver choices are created on the Setup page.
10. The Start Date and End Date can be selected from these fields. Pop up calendars appear to allow you to choose the dates.
11. When you are ready to launch the tasks, click the Create Task(s) button.
12. If you want to review this task's previous launches on a calendar, click on the Current Schedule button.
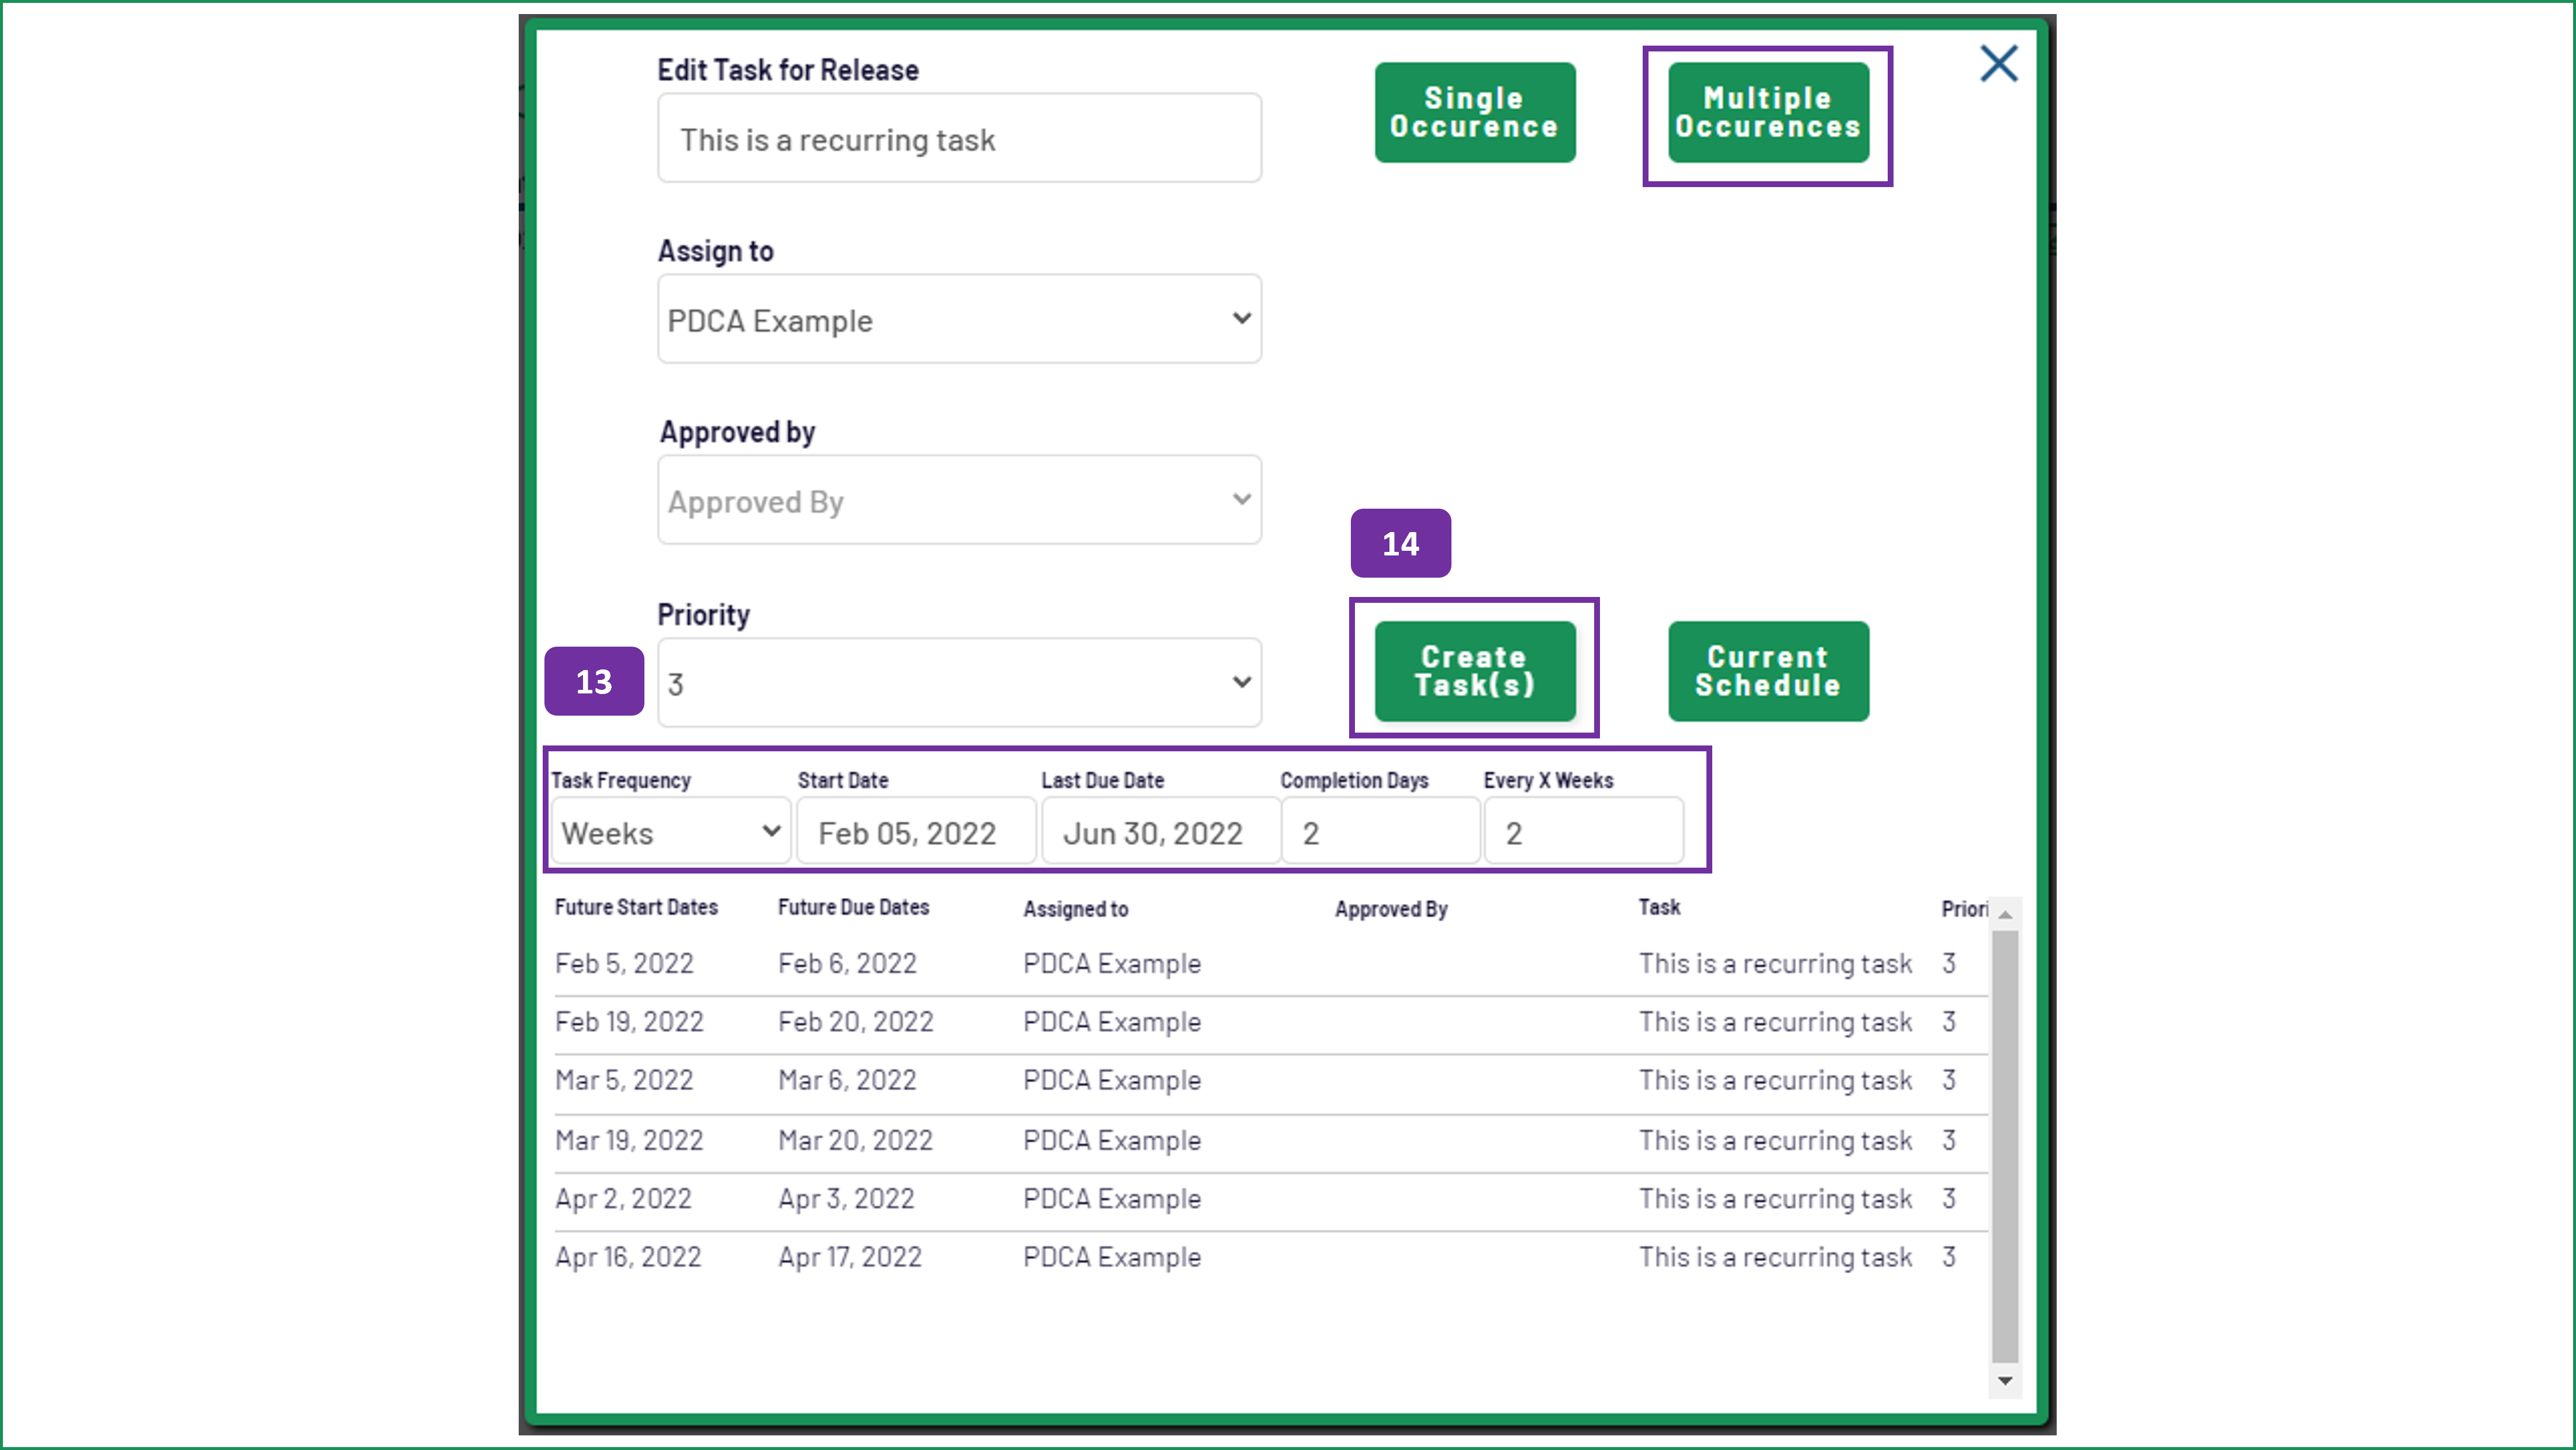
13. If you want to create a re-occurring schedule for your task then select the Multiple Occurrences button. You can adjust the parameters of the task as follows:
- Task Frequency: Weeks, months or years.
- Start Date: Choose the start date from the pop up calendar.
- Last Due Date: Choose the effective end date from the pop up calendar. Extending this extends the sequence you will see in the table at the bottom of the pop up.
- Completion Days: This will define the task due date for the recurring schedule. This provides the rule for number of days an Assignee can complete the task. The due date is equal to the start date plus the number of completion days.
- Every X Unit: This option allows you to space out the tasks as you require them.
The Assign To, Approved by information and Priority will come from the information in the top half of this screen.
14. Click on the Create Task(s) button to launch the task schedule.
The calendar of existing schedules is available when you click on the Current Schedule button.


