Workflows
Convert your process checklists into robust task lists that are automatically scheduled when you launch them. Workflows let you schedule multiple grouped items at multiple dates. For example, if you have several preventative maintenance items to do on a machine every quarter, use workflows to schedule them. Once you create a workflow you can schedule at any date and copy them to new workflows.
1. To create a new workflow, click on the New button. See points 4 to 9.
2. You can sort and filter the existing workflows you have defined using this area of the screen.
The Views are:
- My Workflows: This will show just the workflows that you have created.
- Direct Staff Workflows: This view will show you the workflows that the team members assigned to you have created (as per the setup chosen).
The Search box will search through the workflow names and description, and filter the results based on the findings.
The Sort options are:
- Description: This will sort the list, by description, in alphabetical order.
- Last Issued: This will sort the list by the date the workflow was last issued / launched, shown as oldest first.
- Name: This will sort the list, by name, in alphabetical order.
3. The icons on the right hand side are:
- Briefcase icon: Edit and launch the workflow.
- Calendar icon: Display the workflow task on a pop up calendar. See point 13 also.
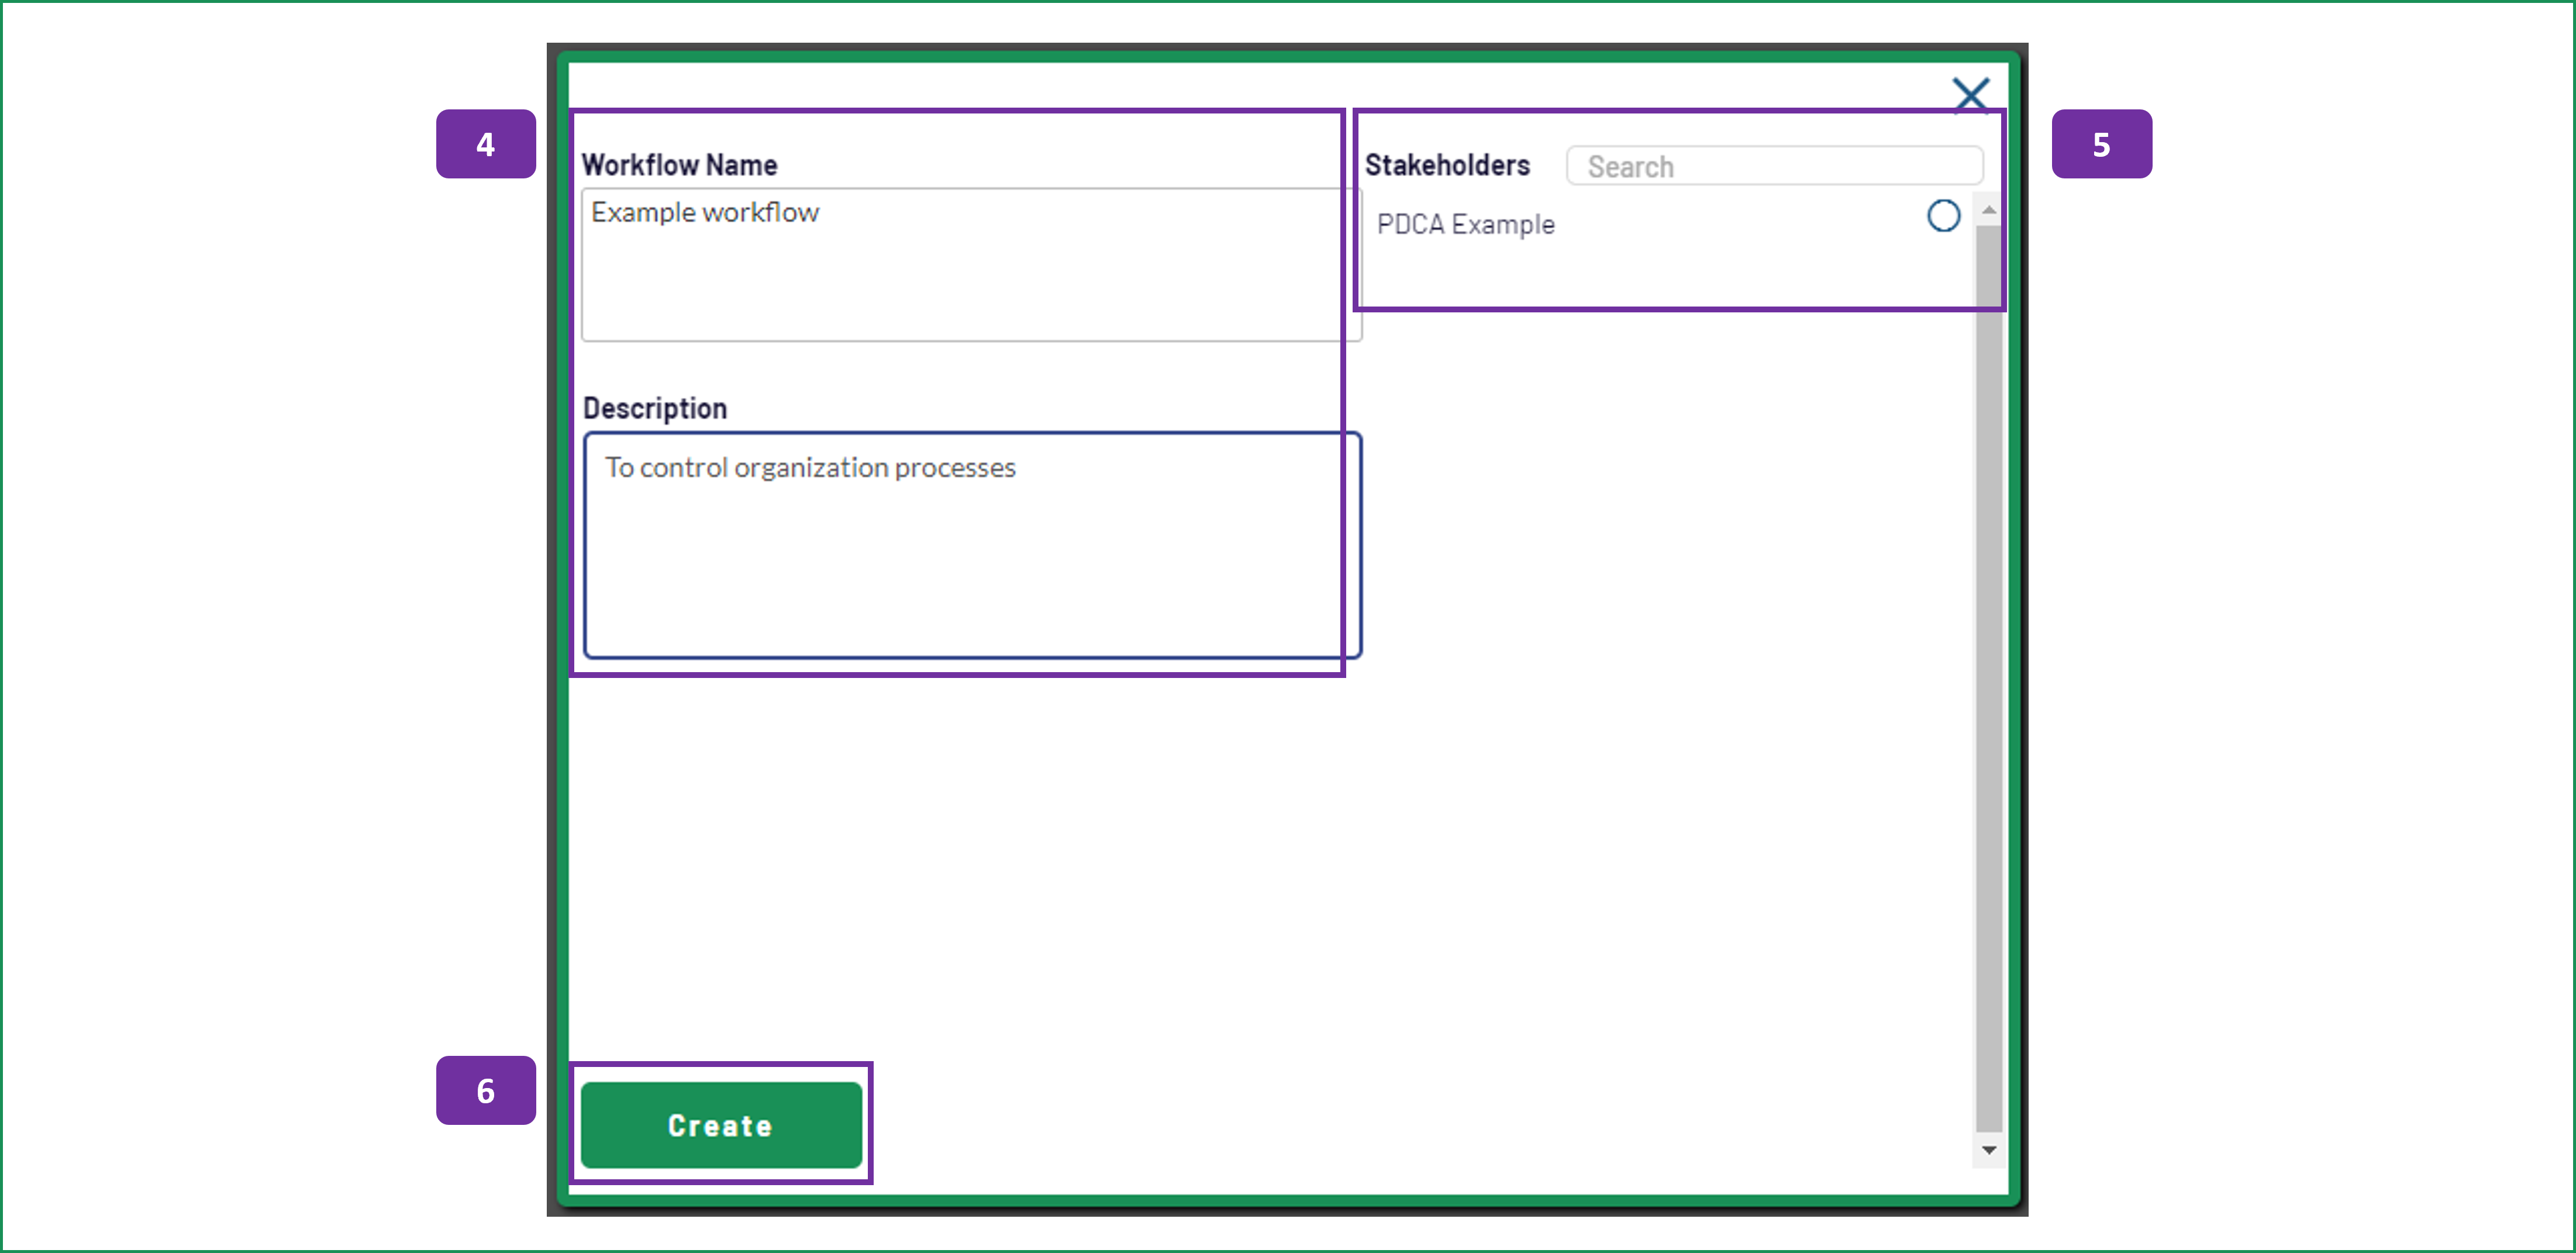
4. When you add a new workflow, or click on the edit option (see point 7) this window appears. Enter the name of the workflow and a useful description.
5. If you want stakeholders linked to your workflow (so that they get notified via emails regarding activity), select them from the right hand side of the screen. Stakeholders are automatically copied to each task during task creation. You can also edit the stakeholders during the task creation.
6. When you have added your information, click on the Create button to save the basic workflow data.
7. On the workflow detail screen, these icons are:
- Rocket icon: This will launch the workflow, see points 10 to 12.
- Edit icon: This will bring up the edit window, as per points 4 to 6 above.
- Copy icon: This will allow you to duplicate the current workflow, so that you can edit it to become another workflow.
8. The second row of icons are:
- Plus icon: This allows you to add an item to the workflow, to build the sequence. See point 9.
- PDF icon: This will allow you to create a PDF print out of the workflow. Please note that this is only available with a paid subscription.
- Arrow icon: This will take you back to the workflow menu, as per points 1 to 3 above.
9. Add a new task to your workflow by:
- Task: Description of the workflow task.
- Assigned to: Define who will be responsible for the task, using the drop down field. Choices are defined by the Setup page
- Start After: This is the delay before the task should start. For example, day zero would be the first day of the workflow, day seven would be one week after the workflow start date.
- Due After: This is the number of days you want to allow for this task.
- Approved by: This is an optional field, if you want this particular workflow task to be approved by another team member. Choices are defined by the Setup page.
- Priority: Adjust as appropriate.
A green disk icon will appear on the far right hand side when the mandatory information (red borders indicate that the field is mandatory) has been completed. Click on this to save the record.
Repeat points 8 and 9, until you have built your workflow.
10. To edit any of the workflow steps, use the pencil icon next to the task you wish to adjust.
If you want to delete a step, use the trashcan icon in the bottom right hand corner of the edit window.
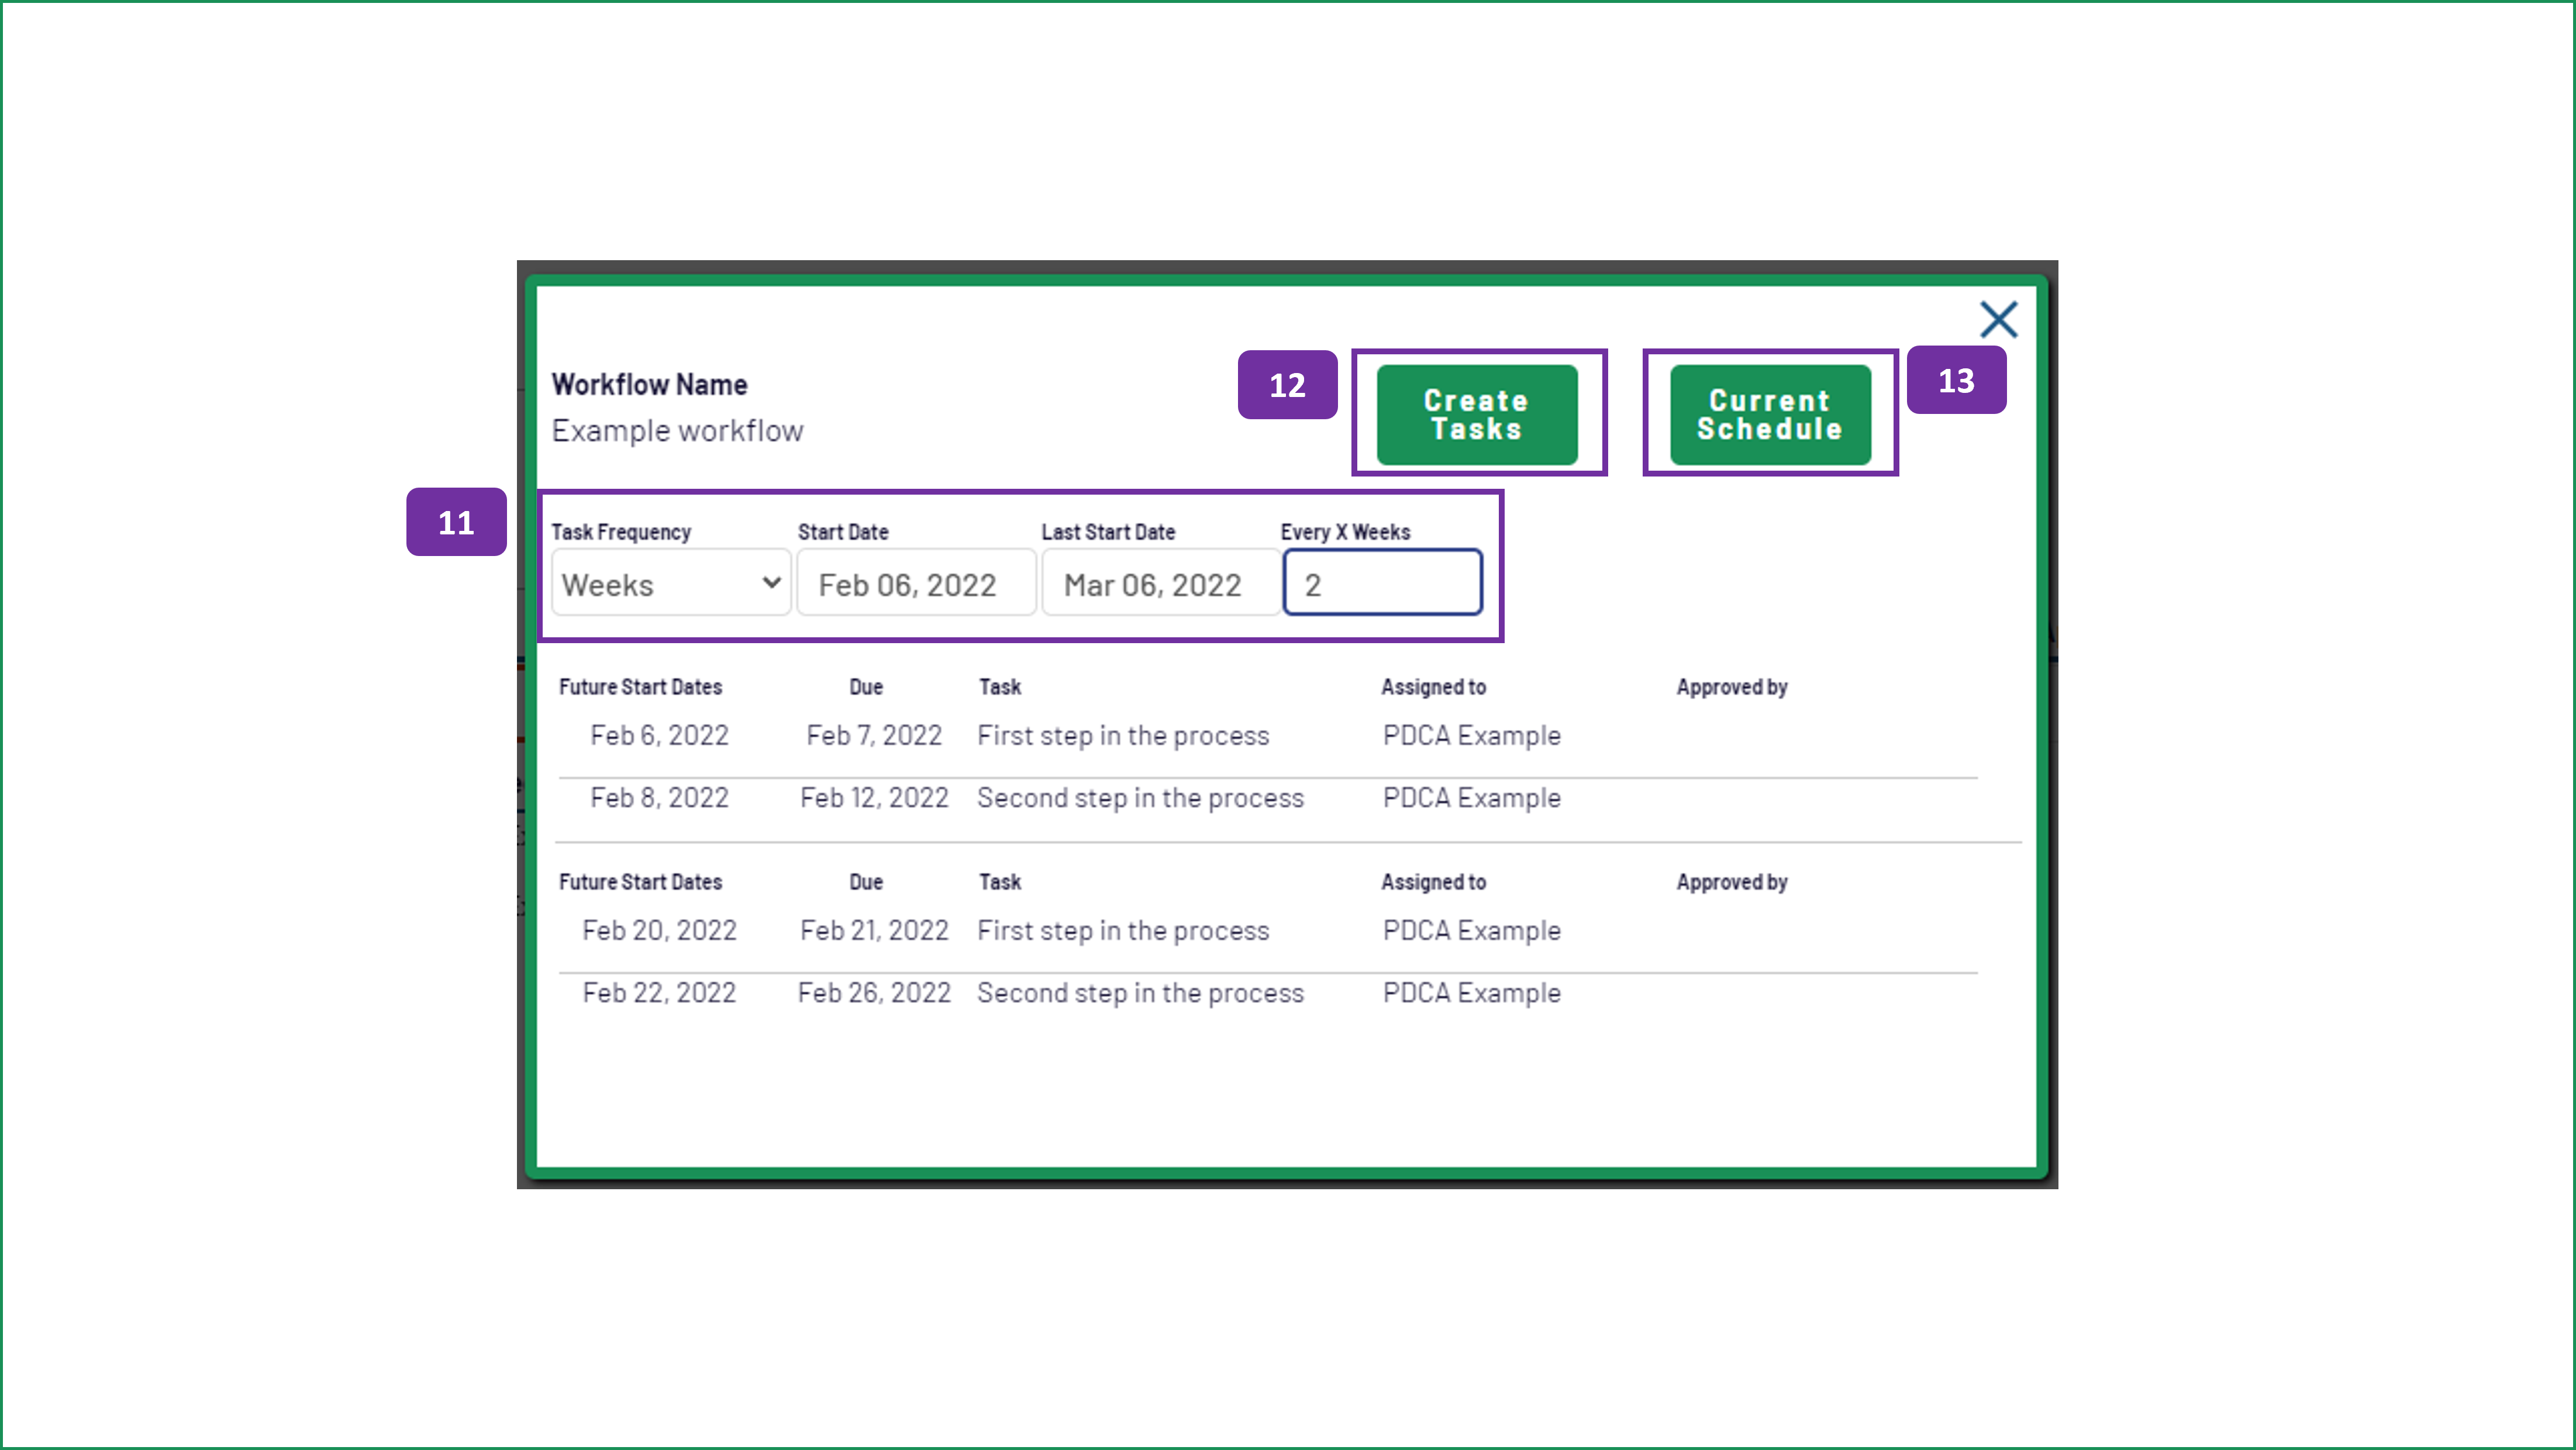
11. When you launch a workflow this window will appear. Adjust the following to configure the workflow before the tasks are created:
- Task Frequency: This can be changed between weeks, months or years.
- Start Date: This is the start date for the range of events to be created.
- Last Start Date: This is used to define the end of the range where the events will be scheduled.
- Every X Weeks / Months / Years: This allows you to create intervals. If you want the workflow sequence to run every week, for example, this would be a value of one. Fortnightly would be a value of two.
The table in the lower half of this pop up window will show you the proposed scheduled. Change the values in section 11 to adjust the proposed schedule.
12. When you are happy with the schedule, click on the Create Tasks button.
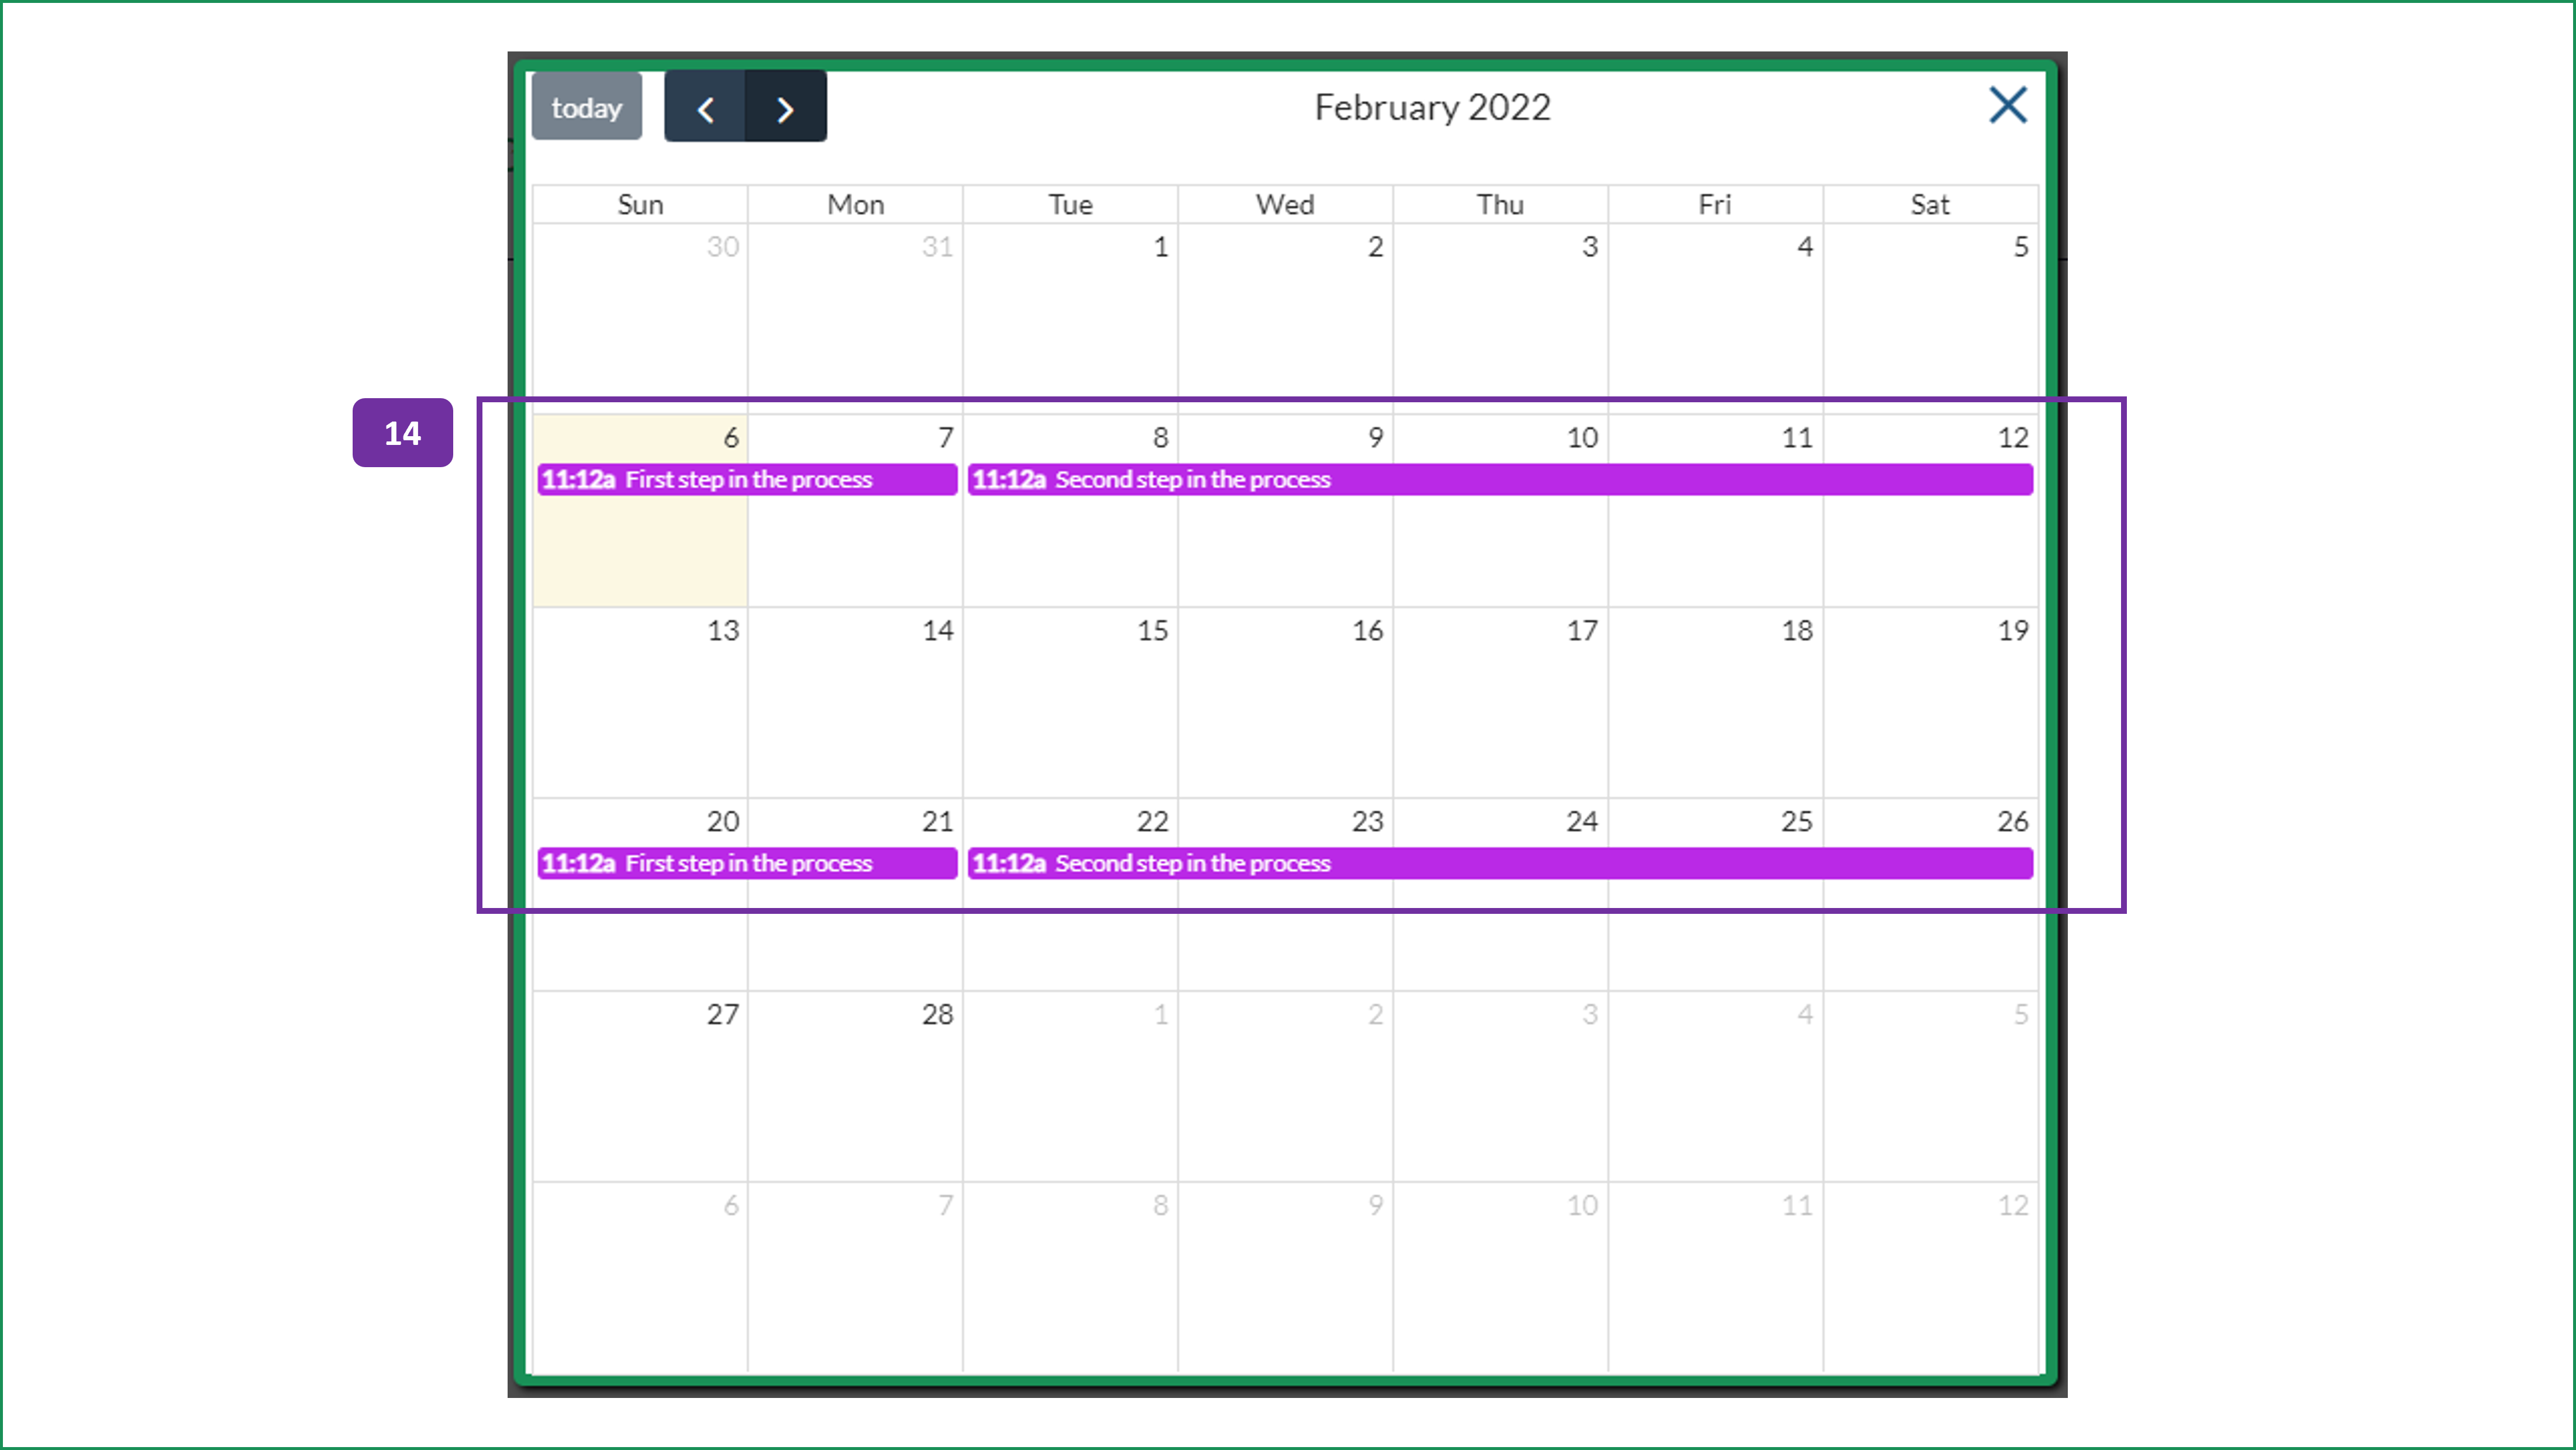
13. To see a schedule of existing tasks created for the selected workflow, click on the Current Schedule button, see point 14.


